Thursday, October 27, 2016

Beanie Boos | D-lish Scraps

Hello Craft Friends!! I hope you're enjoying your week so far!
I'm here today with a new layout share featuring all of my D-lish favourites - a Stitchable heart, Circle Journal It spots, paper flowers, Lace Doilies, a Sequin Bow, plus Glitter & Enamel dots and a couple of extras {insert multiple heart emojis}

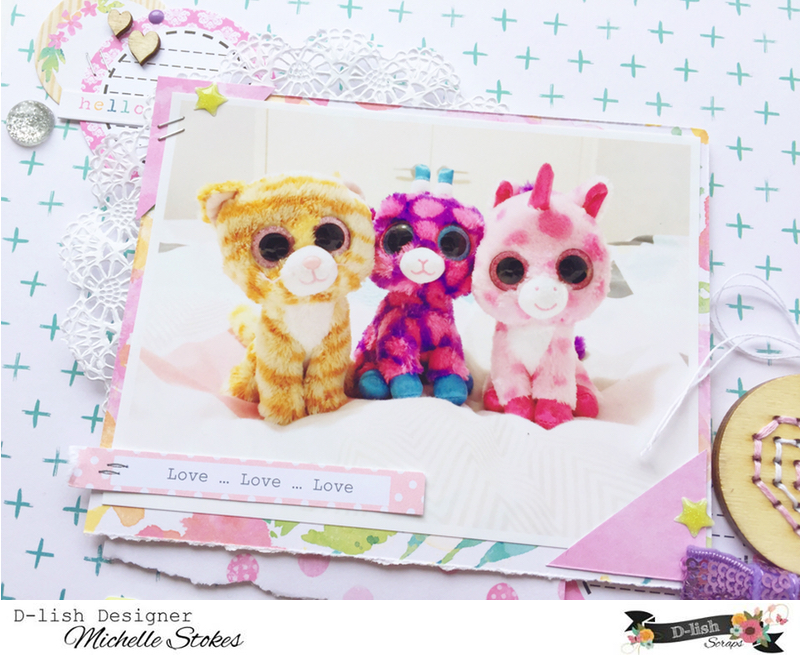
The photo I'm sharing today is super cute, and helps to document another little part of Leila's story as a 5 year old.. She absolutely LOVES these Beanie Boos, and so do I. Can't help but collect them ALL

I've gathered all my D-lish goodies, along with some papers from the Make A Wish Collection from Cocoa Vanilla Studio. The colours of the papers and embellishments really help to make the photo pop.

Lets take a closer look..

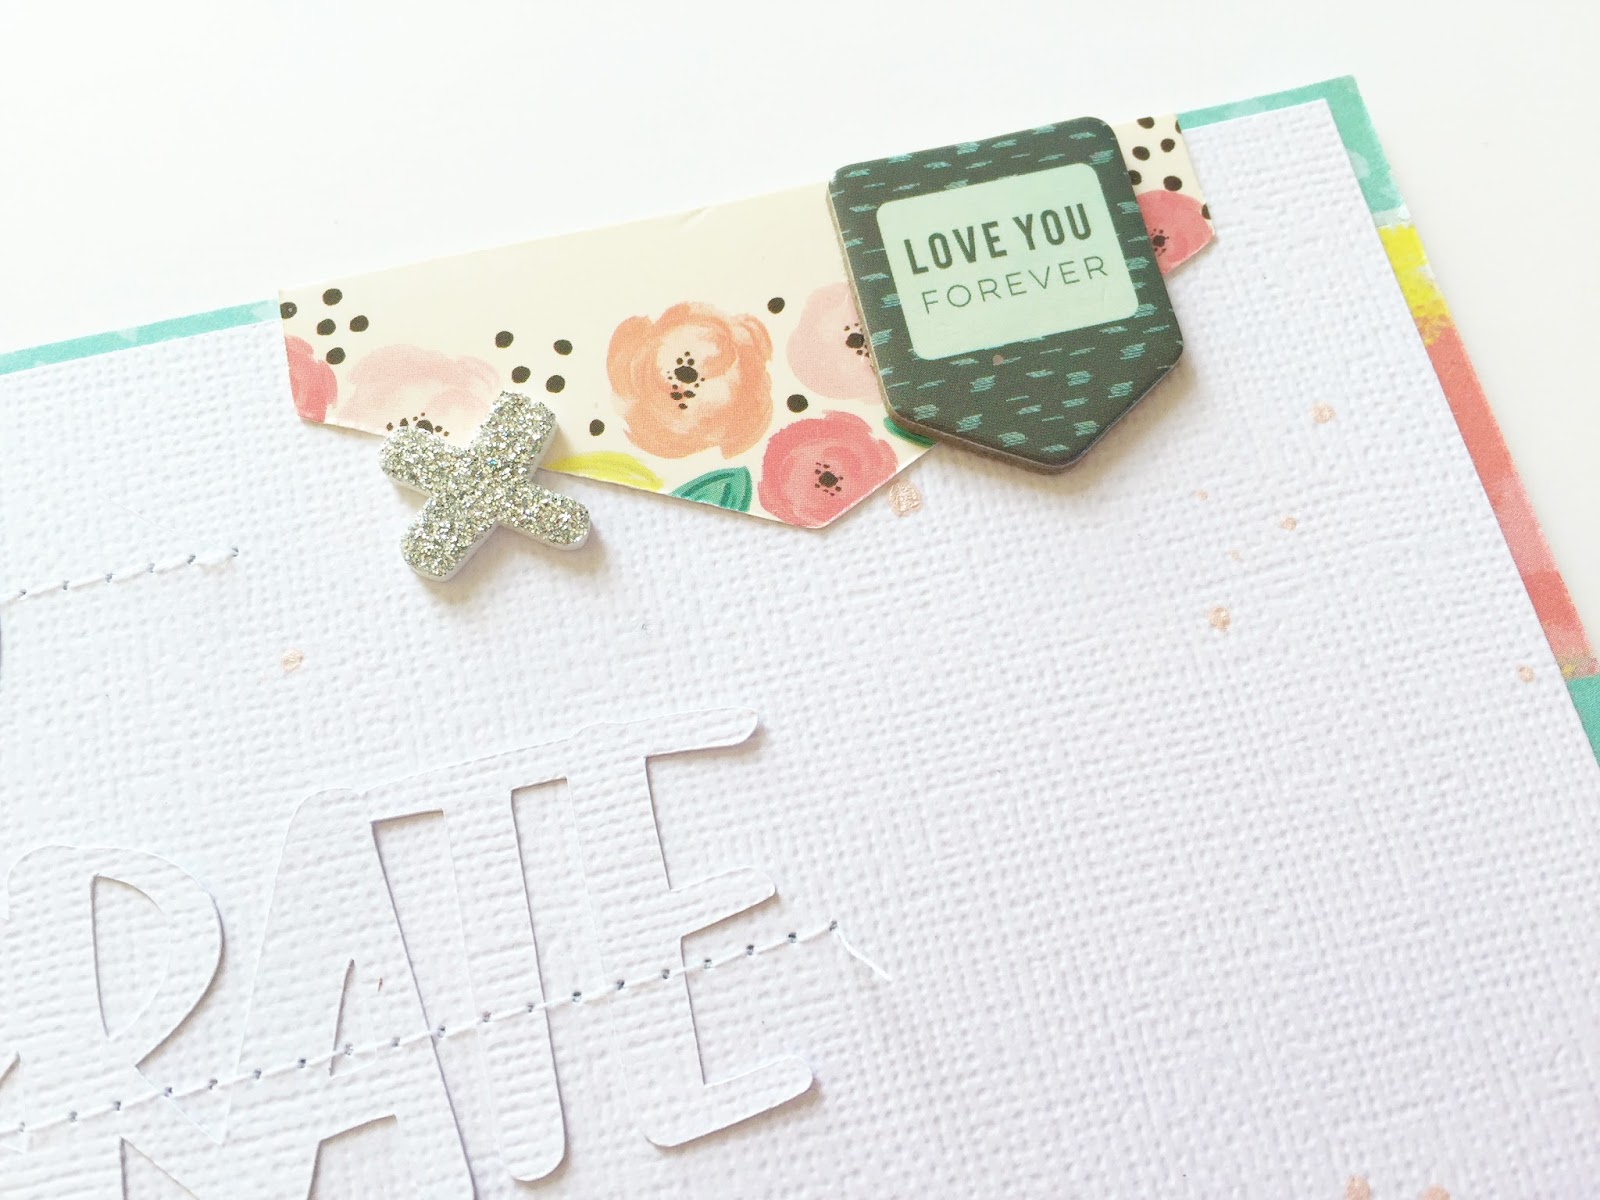
Love to layer different items to create clusters. Here I've used a Journal It spot, Veneer Hearts, Glitter dot, Enamel dots/shapes and stickers from the collection used. 

I kept the photo mat pretty simple with just a couple of pattern papers, torn along the bottom for some extra texture, a pretty Lace Doily and a Minifetti strip

How cool are these alpha's? So bright and fun! Perfect finishing touch to a page for a big title.

The bottom cluster is made up of multiple layers of pattern paper and embellishment pieces repeated from around the page.

Quite a few lines of journalling added to the page using my trusty {really should be replaced} typewriter.

And lastly here's a closer look at the main cluster of the page. I stitched the heart in 2 different colours to accentuate the heart shape, rather than the cross stitch I've used on previous hearts, then added some extra thread to the top in a bow. You can see I've added in a third Circle Journal It spot, plus more Glitter & Enamel dots. More often than not, I use repetition of embellishments around the page in either a diagonal design or a visual triangle. This draws focus around the page, and back to the photo.

That's all from me today. Thanks so much for stopping by!
Until next time, Happy Scrapping!!
Michelle x

Saturday, October 22, 2016

Superstar | The Cut Shoppe

Hi Everyone! Today I'm back with a fun new layout featuring one of the new cut files released in The Cut Shoppe - The Midnight Hour. 

This little Aussie family isn't big on Halloween, and we're currently in the middle of a very cold Spring season, so most of the current Cut files were a little tricky to use. However this super awesome 12x12 cut file made up of stars looked like it was going to be fun to create with.  The collection I've used for this layout is the stunningly beautiful Make a Wish collection from Cocoa Vanilla Studio, made up of some of my favourite bright colours.


To start the layout, I cut the entire design out on white cardstock, then saved all the extra star pieces from the middle of the whole stars. Next I went back to silhouette studio and removed 1 single star from the design, the one with the empty centre, and enlarged it to fit the page. This took a couple of cuts to ensure I had the right placement to be able to use the extra cut piece over the top, without having to chop any edges off. 


Once all cuts were complete, I layered a piece of pattern paper with the full 12x12 stars cut out over the top, then the enlarged star cut sheet on top of that. I've sewn around the edge of the star for a little extra detail, then added the larger star cut out over the top with some foam tape for dimension.


I kept the photo stack pretty basic with two pattern papers and a couple of label stickers, then a cluster of ephemera from the collection pack and more stars to the top right.


I've used pieces of the stars cut file that weren't going to show through the large star design in the top and bottom corners. This creates a diagonal design on the layout, and helps to draw the eyes attention across the page. I layered more pieces of ephemera from the collection to finish it off each corner.


Thanks for joining me today! I hope you've found my layout inspiring. 
Until next time, Happy Scrapping

Michelle xx

Wednesday, October 12, 2016

Cute Snapchat Fun | D-lish Scraps

Hello Hello! I'm back today with a new layout share for D-lish Scraps. I'm so excited to be staying on the team for a few more months to share more scrappy goodness! 

The layout I'm sharing today is based on a challenge set by Amanda from the September Cyber Crop.  "To use a word cloud as inspiration for your project"

I've used some of the new Puffy Alphas, Kaisercraft alpha stickers, wordfetti strips, a silver glitter thicker word and some typed journalling to create my word cloud. I also added a Dusty Attic chipboard speech bubble and some page pebbles to create dimension and to add a different texture to the page. I sewed through all the alpha sticker words for added detail, and to keep them stuck on the page, as over time I find the Kaiser stickers can become less sticky.

Let's take a closer look..

I've scattered little groups of embellishments rather than the big clusters that I've been making recently. I've used my absolute favourite paper flowersForget me Nots, along with resin flowersnew glitter dots, a resin birdheart and enamel shapes. I also altered both page pebbles on the page with a gelato, smudged straight onto the chipboard for an extra pop of colour.

So many words to describe the photo I chose, I could have kept going!

I felt that the speech bubble needed to stay plain, rather than altering with colour or glitter, as the page is quite full of colour as it was. I also had a different colour felt bow on the page, but swapped it out for the white & black at the last minute.

And the last scattering of embellishments. I added more stitching to the edge of the wordfetti strip too. Love the extra detail machine sewing gives to a page.

And lastly a close up of the adorable picture I chose to document. We really do love snapchat here! There's plenty more photos in our collection to add to the scrapbooks too

Thanks so much for stopping by today! 
Until next time, Happy Scrapping

Michelle x

Saturday, October 8, 2016

You are Two | The Cut Shoppe

Hi Everyone! I'm here today with a fun and bright layout featuring the Brush up Alpha cut file for The Cut Shoppe. I've used more of my current favourite Fancy Free collection from Pink Paislee, as its still relatively new to me, and it took so long to get my hands on it here in Australia!

I'm finally documenting a special 2nd birthday from a few years back with this page, and I'm really happy with how it turned out. 

To create the background I've made the words by welding letters from the Brush Up Alpha set together, then grouped the words together to enable me to resize each individual line separately. Once cut out, I've sewn each line down onto the white cardstock using both straight and zigzag stitch. I really like the white on white look, as it allows you to add more detail without it taking over the page.


To create the photo stack I've layered 6x6 papers with a lace doily, and popped them up with some fun foam for a little extra dimension. I also added part of my journalling to the blank space on the photo. I found this helped to finish the page off.


Now I know I've used these fussy cut flowers on my previous pages, but I REALLY like the way they look arranged like this. Plus, I don't have the matching ephemera pack from this collection, so I repeated the arrangements to ensure the page was embellished.


Once the remainder of the page was finished I worked on making the title POP. I did however make a slight boo boo with Color shine as it was already sewn to the page. Whoops! I do still like how it turned out, even with the extra colour along the stitched line


Lastly, I cut down the edges of the white cardstock slightly, and matted to a pattern paper from the same collection, then made a mini cluster to the top right of the page with part of a tag, some chipboard and a glitter thicker cross


Well thats all from me today, Thanks for stopping by.
Until next time, Happy Scrapping!!
Michelle x


Tuesday, October 4, 2016

2 Crazy Kids | Pink Paislee

Hi Everyone!
Today I have a quick 'Just for Fun' Layout to share with you all. I'm still going crazy with the Fancy Free collection. I can't help it!

This layout documents a fun and crazy photo of Leila and our nephew Flynn. These two play so well together, and get a little crazy at times!
To create the background I used the No.6 paper from the 6x6 paper pad, the one with lots of pattern squares. I used both sheets from the pad, cut all the squares into messy triangles and arranged them in 2 different directions. I glued each triangle down in the centre, then sewed messy lines through each row, and roughed up the corners. Once this was finished I worked on creating the photo and title cards stack. This time I've used pieces of the B side of pattern paper no.11 and a couple of Journal cards from the Tags pack. I've used chipboard, thickers and fancy buttons from the collection for embellishing and part of the title, plus I punched heart shapes from the 6x6 piece of no.3 paper. Lastly I dipped into my hoarded collection of alphabet stickers to create the remainder of the title, then added some typed journalling to finish it off.

Here's some close ups..


Thanks so much for stopping by. 
Until next time, Happy Scrapping!
Michelle x

Saturday, October 1, 2016

Just the three of Us | D-lish Scraps

Hello Hello! 
Hope all my crafty friends are well!

Some of you may have seen the announcement yesterday for the new Design Team. I'm so excited that I am staying on! YEP, you haven't seen the last of me over there just yet lol So very thankful that Amanda decided that I could stay on the team, as I just wasn't ready to say goodbye just yet!

On that note, today's layout share is for D-lish Scraps and is inspired by the Newest Inspiration Board. Here's a look at this months Board.. 

 
Loving this colour palette, and I had too many ideas forming so it was hard to get started.. 

So here's what I came up with..

I've documented a very sweet moment between the three of us, a very rare opportunity to capture a photo. In saying this, I've actually framed this layout ready to hang somewhere in our house.

I kept the embellishments to a minimum as I used quite a busy pattern paper for the background, and kept the title smaller than I usually would. For the cluster I've grouped together a Stitchable Heart, white Magnolia and a Cherry Blossom. I also tucked in a minifetti strip under the flowers and used a new Glitter dot and an enamel heart to balance out the cluster

Theres a bitty bag unfolded and roughly torn tucked between the photo and lace doily, then a 'Right now" journal it (these can be found in the monochrome journal it packs) tucked into the top of the photo and stapled down

I made a mini cluster at the top left of the page using a wood veneer star, minifetti strip and another new Glitter dot. Then I glued that felt bow down with my hot glue gun and instantly regretted its placement. Wishing it was on the top of the frame below it, but oh well.. It still looks ok. 

Lastly I added another mini cluster to the bottom left of the layout using a strip of mini washi tape, a flair button, another Wood veneer star and glitter dot, and finished it off with some strips of journalling. Once the page was complete I added in a few mini crosses using a flat paint brush and some Jillibean Soup Happy Hues paint in the Amiable Aqua colour.

Thats all from me today. Thanks so much for stopping by
I'm excited that I get to continue sharing my work within the D-lish Scraps Community, and hope that you all enjoy seeing it just as much!
Until next time, Happy Scrapping
Michelle x


Night Time Snuggles | Scrap the Girls

Hello Hello Scrappy Friends! 
First day of the month = a new challenge at Scrap the Girls
This month we're playing along with a Mood Board Challenge thats being Sponsored by Flutterby  Designs
I thought this was going to be a tricky challenge, but I really love how it turned out in the end. I'm really thankful for my obsessive organisation within my craft room, as it makes these challenges a little easier to create with.

Here's what I came up with..

I've chosen a sweet photo of Lelia to document, one thats very rare. We do love our nighttime snuggles here, and are cherishing every one while she's still willing. It's also a chance to document another moment in time - an 'almost' sleepover. In the 5+ years of her life, she's had 1 sleepover. Mainly due to us living with my parents for most of that time and it feeling like a constant sleepover lol 

I really love this colour combination, and I don't normally scrap using purple. It's a colour that is not often used within scrapbook collections, so it's quite tricky to match to the colours on the board. I went with similar shades that I had within my paper stash and completed the page with embellishments from D-lish Scraps

Love me a sequin bow, and maybe these paper flowers too. To add extra texture and interest to the page Ive torn the edge off the purple stripe paper, and used a border punch on the other. I also folded and stapled the corner of the spotted paper

I've added in a butterfly cut file from The Cut shoppe, it's been sitting on my desk for quite some time and complimented the page quite well.

A closer look at the layers, popped up with fun foam for dimension. The title is made up of thickers and alphabet stickers I've had in my stash for a few years..

Time for a new typewriter ribbon, as I'm really enjoying the finished look that typed journalling gives to a page.

And lastly an extra strip of paper from the bottom edge of the grid paper I used, I also tucked in a small piece of the purple stripe paper and stapled down a Wordfetti strip from D-lish Scraps.

Links to D-lish products used:

That's all from me today, be sure to check out the STG blog to see all the other designers work!
Thanks so much for stopping by 
Until next time, Happy Scrapping
Michelle xx