Friday, August 30, 2019

Cocoa Vanilla Studio | Happiness Is


Hello Friends, I'm back again with a bonus layout share for Cocoa Vanilla Studio this month! I'm trying to crank out as many pretty layouts as I can using the beautiful Happiness Collection before the brand new Unforgettable collection arrives on my doorstep and all other collections are forgotten HAHA 


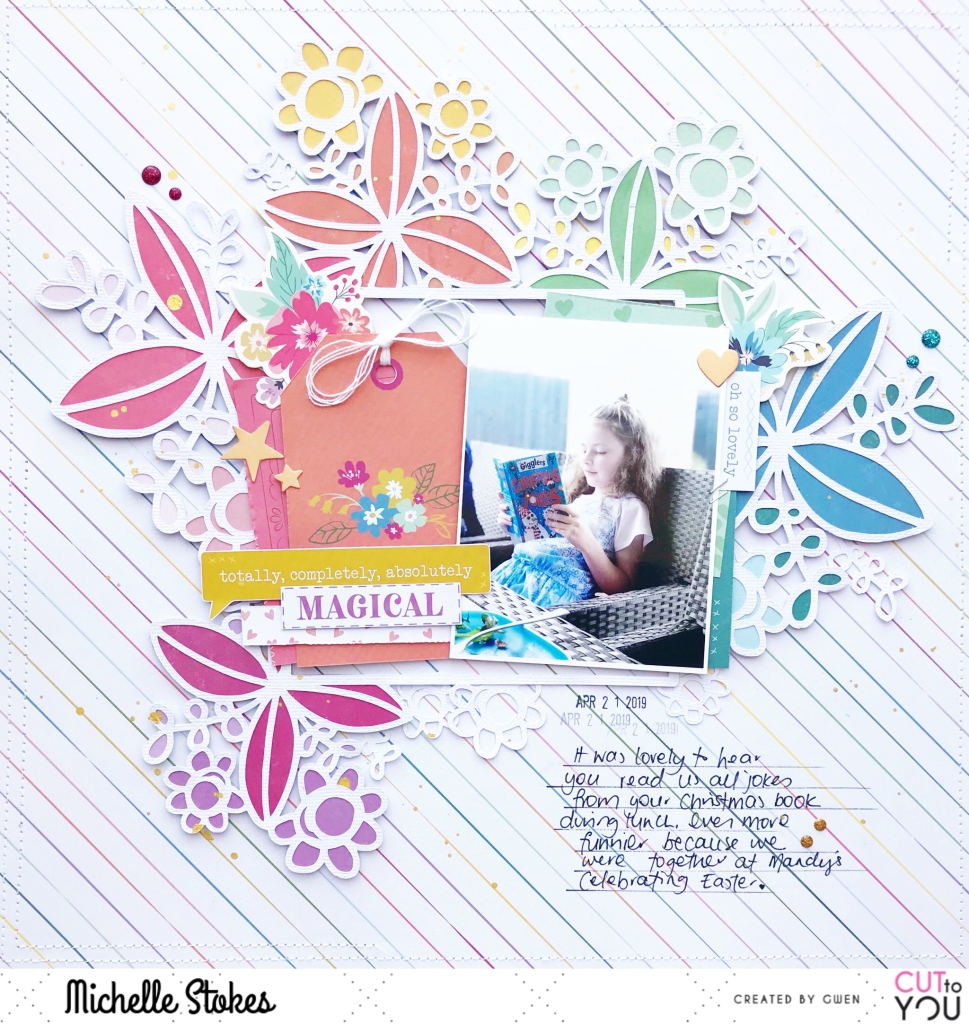
The layout was inspired by a sweet photo of a few familiar faces from this years Creative Escape Retreat in Coffs Harbour. LOVE LOVE LOVE spending time with these lovely ladies and it was SO good to meet Anna in person 


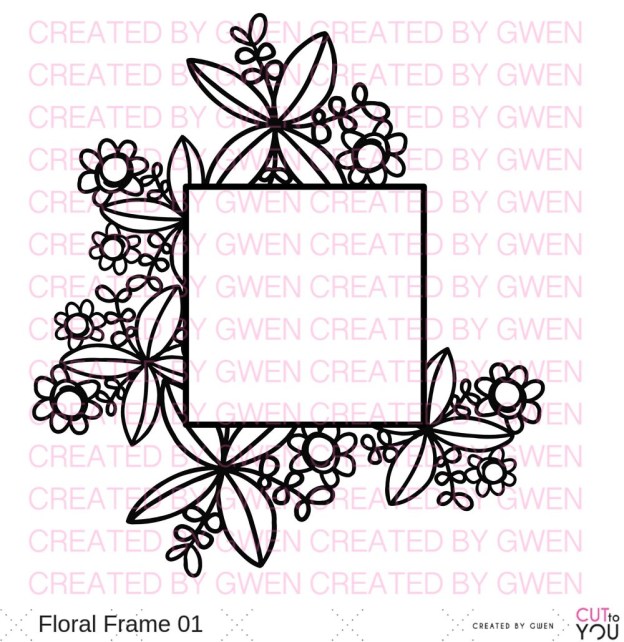
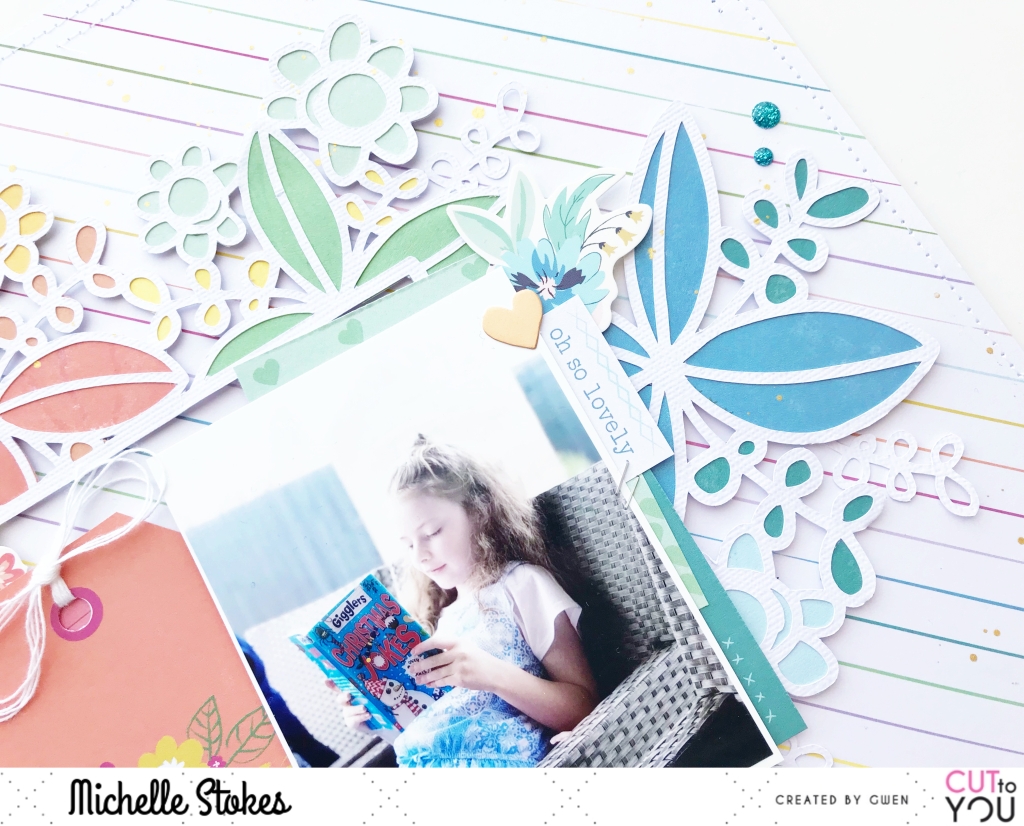
To begin the layout I cut out the Floral Banner cut file from CUT to YOU using white cardstock and backed it using block colours of bright patterns Good Vibes, Expressive & Frame of Mind. The main banner piece is backed using the multicolour spot paper Sprinkles and layered together with a strip of vellum and the woodgrain pattern of the Bright & Beautifulpaper. I also cut the florals off the main banner rather than keeping them as one whole piece. This gave an extra layer of depth and dimension. We all know I love small hints of dimension on a layout!

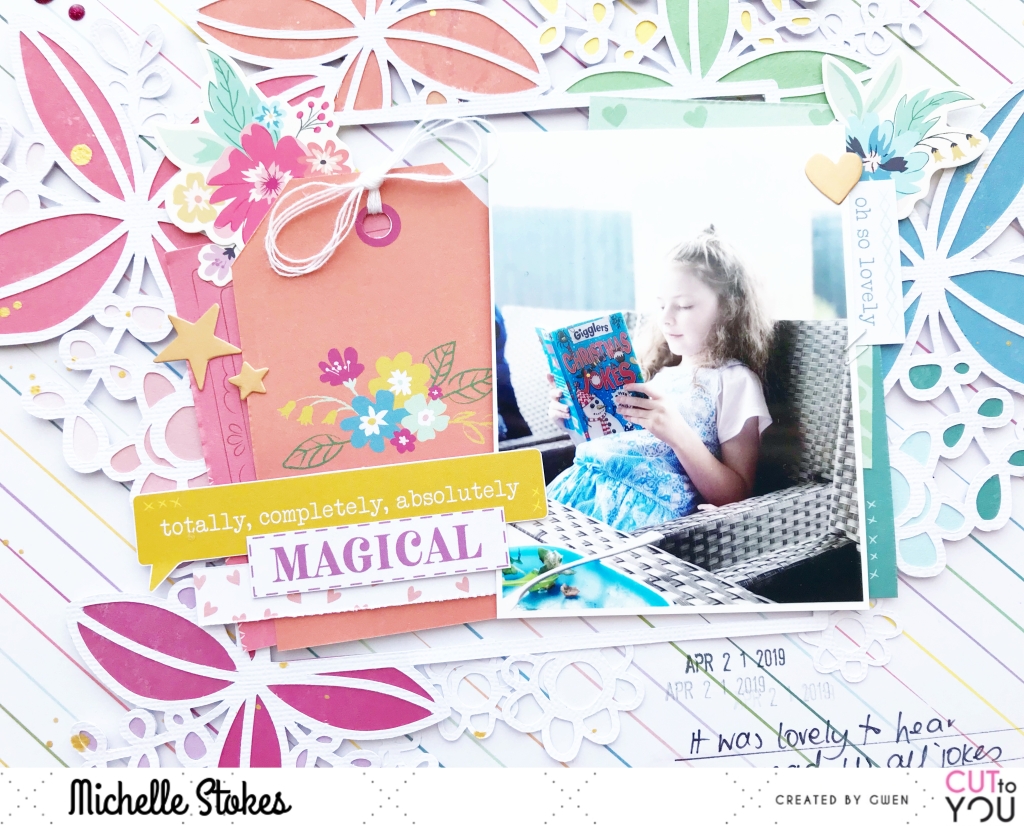
The photo is adhered to the reverse pattern of Botanical Blisswith the addition of a couple of ephemera pieces to create part of the cluster top right.


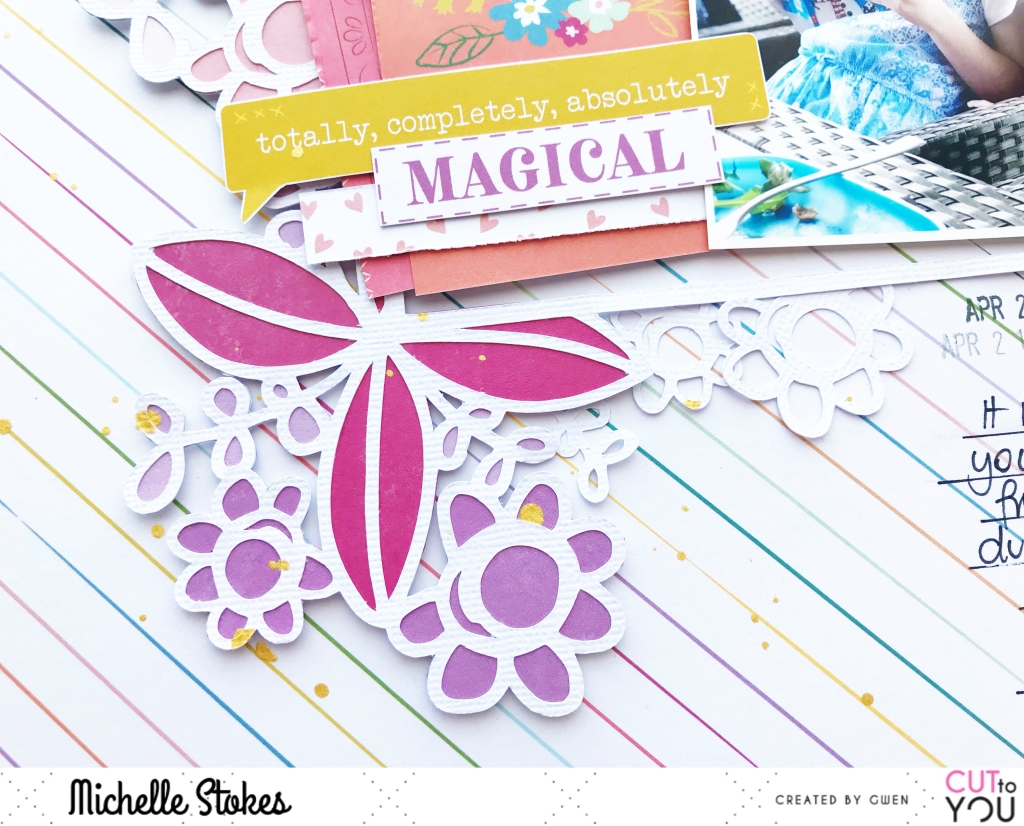
I had a handful of florals and butterflies, fussy cut from previous layouts, that I added to the florals of the die cut. I tucked in a couple of leaves from the ephemera pack too


I fussy cut a few more florals from the Botanical Blisspaper to tuck into various places of the layout adding hints of orange. There's also a couple of clear stickers added here n there


The title is made using a couple of accessory stickers and cardstock title piece, raised slightly using glue dots.


Lastly a few splatters of gold ink, a date stamp and handwritten journalling and it was finished.

Thats all from me for my final share this month, thanks so much for stopping by. Be sure to share all your crafty goodness using all things Cocoa Vanilla Studio in the Facebook group HERE

Until Next time, Happy Scrapping!

Michelle xx


Sunday, August 25, 2019

Cocoa Vanilla Studio | Sweet Moments

Hello Crafty friends, I'm back today with a new layout for Cocoa Vanilla Studio.This layout is based on the super fun Page Maps sketch shared by my fellow team members this past week. I had so much fun using the sketch as a kick starter for this layout, and that Midnight collection worked perfectly with the floral design elements


Love that these photos document a sweet moment shared between both Leila and my nephew from a few years back. They both love to read


TO begin the layout I cut down a piece of white cardstock to roughly 11.5inch square and adhered to a 12x12 piece of the stunningly beautiful INKY DEPTHS paper. Love the tiny floral design of that pattern paper. Once the 2 papers were secure I roughly drew then sewed multiple circle shapes similar to the large version on the sketch.

I gathered a couple of photos, printed black and white so as not to clash with the colours of the sweet Midnight collection. There were layered to the right of the large sewn circles and adhered using foam tape for slight dimension. I've tucked some ephemera pieces and fussy cut florals from the BLOOM AND GROW paper above the top photo


Between the photos I've layered a strip of roughly torn pink paper from the ombre SHINE BRIGHT design and a piece of the  blue and white diagonal stripe frame found in the ephemera pack to replicate the scalloped piece on the sketch. I've also added a second piece of the torn pink paper to the top of the layout


TO the left of the photos I created the large title cluster using more elements from the ephemera pack and die cut titles that looked similar to those on the sketch. Especially those mason jars and florals. Perfect pieces! To give them all different dimensional heights I've used multiple adhesives - raised and flat glue dots, foam tape and good ol tacky glue.


Lastly I added some handwritten journalling and a few splatters of gold ink and called it done.

Well thats all from me today, thanks so much for stopping by! I really enjoyed playing around with this sketch as it helped get my creative juices flowing when I was stuck in a rut. I hope it inspires you all too!

Until Next time, Happy Scrapping (or sketch scrapping)

Michelle x

Sunday, August 18, 2019

CUT to YOU | Wonderful You

Hello! I'm back today with a new layout to share with you all. I've used the awesome Banner Trio cut file for this creation along with a CRAZY photo of my cheeky Leila.


To start the layout I duplicated the top design within the Banner Trio set, and resized each piece individually so they were all slightly different in length. I cut them out using white cardstock and my silhouette machine then backed using some pretty pattern papers from the Maggie Holmes Willow Lane collection. SO sweet!


I adhered the banners to the cardstock background using foam tape, giving each piece slight dimension on the page.


I slightly overlapped them all to give a true bunting banner feel. I added the photo stack to the right side of the banners, layered with different coloured cards and pattern paper to compliment the banners


I fussy cut flowers and butterflies from the collection to create a cluster at the end of the bottom banner


And added a smaller cluster along with hand written journalling along the bottom right of the layout. Once all the bits and pieces were glued in place I adhered the entire background to a larger pattern paper and sewed around the edges using machine and thread. This gave the entire layout a boost of colour and helps make the cut file pieces really pop out from the page.


Thats all from me today. Thank you so much for stopping by. 


Be sure to check the CTY shopto see whats new this month and don't forget to share your love for CTY in our community group on Facebook.
Michelle x


Until next time, Happy Scrapping


Sunday, August 11, 2019

Cocoa Vanilla Studio | You are Awesome

Hello Scrappy friends It's Michelle back today with a new layout share! This is definitely one to be added to the favourites using the Happiness collection and a pretty awesome cut file from fellow DT member Gwen.


The sweet photo I've chosen to document is of Leila taken back on Mothers Day with her 'new' friend Kermit - best op shop find ever! She truly is an awesome kid, and this cut file from CUT to YOU was the perfect accompaniment for this collection. I managed to pull all of this together with just scraps of papers used on previous creations and 1 full piece of pattern paper for the background edging.


I backed all the pieces of the cut file using the scraps I mentioned before then adhered to the white cardstock using some foam tape for dimension. I layered the cardstock with a full piece of my favourite MEADOW paper for even more colour, and sewed around the edging using white thread.


I added some more of my favourite paper colours to the photo stack. These are the smaller designs you can find in the 6x8 paper pad.


At the top of the photo and bottom of the cut file I added some floral ephemera pieces to give the slight hint of a diagonal design element. I also used the negative star pieces left over from the cut file and some enamel dots (which are making a come back with our upcoming collection and goodness I am excited about it)


Lastly I added a sprinkling of gold colour shine, some handwritten journalling and a date stamp to complete the page.

Well thats all for today. Be sure to pop by the CVS Community group on facebook to share all your scrappy goodness using all things COCOA VANILLA STUDIO

Until Next time, Happy Scrapping!
Michelle x

Sunday, August 4, 2019

CUT to YOU | Beautiful You

Hello Crafty friends! I'm back here today with a new layout share for CUT to YOU using the wonderful All Around Floral cut file design along with a sweet photo of Leila from a few years back. I had SO much fun creating this layout. Lets take a closer look shall we?


For this layout I really wanted the cut file to be BIG, but not too big that it would take up the entire page. I've sized the file in silhouette studio to approximately 9x9 inch and cut it out on some textured white cardstock.


This design is so delicate and sweet. Its perfect for documenting sweet faces like this one...


I backed all the individual florals with different pattern papers, using green tones for the leafy areas and pinks, yellow and blues for the florals. I backed the photo with a complimenting pattern paper and a hearts pattern frame


I raised the entire cut file piece off the background paper to give it dimension. Doing this really brings a layout to life, and by using a thin foam tape ensures your not adding any unnecessary thickness to your albums.


I've added a couple of clusters top left and bottom right of the page using florals from the collection I used from Felicity Jane as I felt they complimented the All Around Floral cut file perfectly.


I also added a hint of machine stitching around the edge of the white cardstock after I adhered it to the pink pattern background. Lastly I added a date stamp, gold splatters and a couple of enamel dots to finish it all off.

Thanks so much for stopping by the CUT to YOU blog today. Be sure to head on over to the CTY SHOP as theres been a NEW RELEASE of designs for this month. Oh and don't forget to join our Community Group CUT to YOU HQ on facebook, where everyone is free to share their work using CTY designs 


Well thats all from me for today, until next time Happy Scrapping!

Michelle xx


Friday, July 26, 2019

Cocoa Vanilla Studio | Happy Times

Hello scrappy Friends, its Michelle here with a new layout share featuring the wonderful Happiness collection and the coordinating FREE cut files designed by fellow DT member Gwen. This was a super speedy layout to create, one that would be easy to recreate if you like the white on white background with pops of colour.


To begin the layout I started by making the background using silhouette studio. I traced only the wreath design from the FREE Cut file set then duplicated, mirrored and resized before cutting on white cardstock.


Next I adhered the pieces to a second piece of white cardstock and machine sewed them all into place, plus the stitching gives the layout a little more subtle detail.


I've used a piece of ** paper under the photo and a smaller strip of ** to add a pop of pink. Both of these designs are the smaller print from the 6x8 paper pad


TO create the Title cluster I've gathered bits from both the ephemera pack and accessory sticker sheet, plus a strip of my most favourite paper MEADOW


I created 2 smaller clusters top left and bottom right of the large outer wreath. These are made up of stickers and ephemera pieces, mainly florals layered with glue dots for slight dimension.


Lastly a splattering of gold colour shine and a date stamp and it was complete. Super sweet and oh so simple and fun to create.

Thanks so much for stopping by, be sure to drop into the Facebook group to share all your craft CVS goodness! We love to see what you all create too.

Until Next time, happy Scrapping
Michelle xx


Thursday, July 18, 2019

CUT to YOU | Absolutely Magical

Hello Scrappy Friends I'm back here today with my next layout share for CUT to YOU! This was the very first layout I created for CUT to YOU that I've been bursting to share with you all. Inspired by so many wonderful rainbow effect layouts created by others and featuring the sweet Floral Frame 01 cut file 

I've chosen a sweet photo of my daughter Leila from Easter Time, reading to us from her Christmas Jokes book. What a laugh that was!

To begin this layout I went straight to Silhouette Studio to cut my file using white cardstock. I kept the file quite large so that it would fill a majority of the 12x12 paper background without taking over too much.

I chose a collection that I've been hoarding for quite a few months - Whimsical by Paige Taylor Evans. This was purely for the rainbow assortment of block colours which are perfect for backing all the florals within this cut file design.


I started with the purple hues and worked my way around the cut file finishing off with greens and blues. I chose the darker of the hues for the large 4 piece floral and the lighter for the smaller flowers and leaf stems. I also added in some extra non backed pieces as subtle layers within the clusters


I've raised the entire cut piece off the pattern paper background with LOADS of foam tape. I really like the dimension effect foam tape gives to a layout without bulking it up too much. This allows plenty of space to tuck in embellishments for extra pops of colour and layers. Love me some layers!


In the middle of the frame I added the photo and layered tags and pieces of pattern paper that compliment the side of the frame that they're touching. I added strips of text to create my title rather than using big alphas. This made it blend all together helping the photo and cutfile become the heroes on the page rather than a massive title.


Lastly a sprinkling of enamel dots from Cocoa Vanilla Studio, a splattering of gold Colour Shine, some handwritten journalling, date stamp and some machine stitching around the edges and I called it done.


Thank you so much for stopping by today! Make sure you stop by the CUT to YOU store to check out all the new files that have just been released. And if you're not already aware - we have a little community group on Facebook where we welcome you to share all your creations using all the fun CTY cut files you've used!

Until Next time, Happy Scrapping 

Michelle xx